Flood Depth Mapping service tutorial
Find FHM service description and specifications here.
Select the processing service
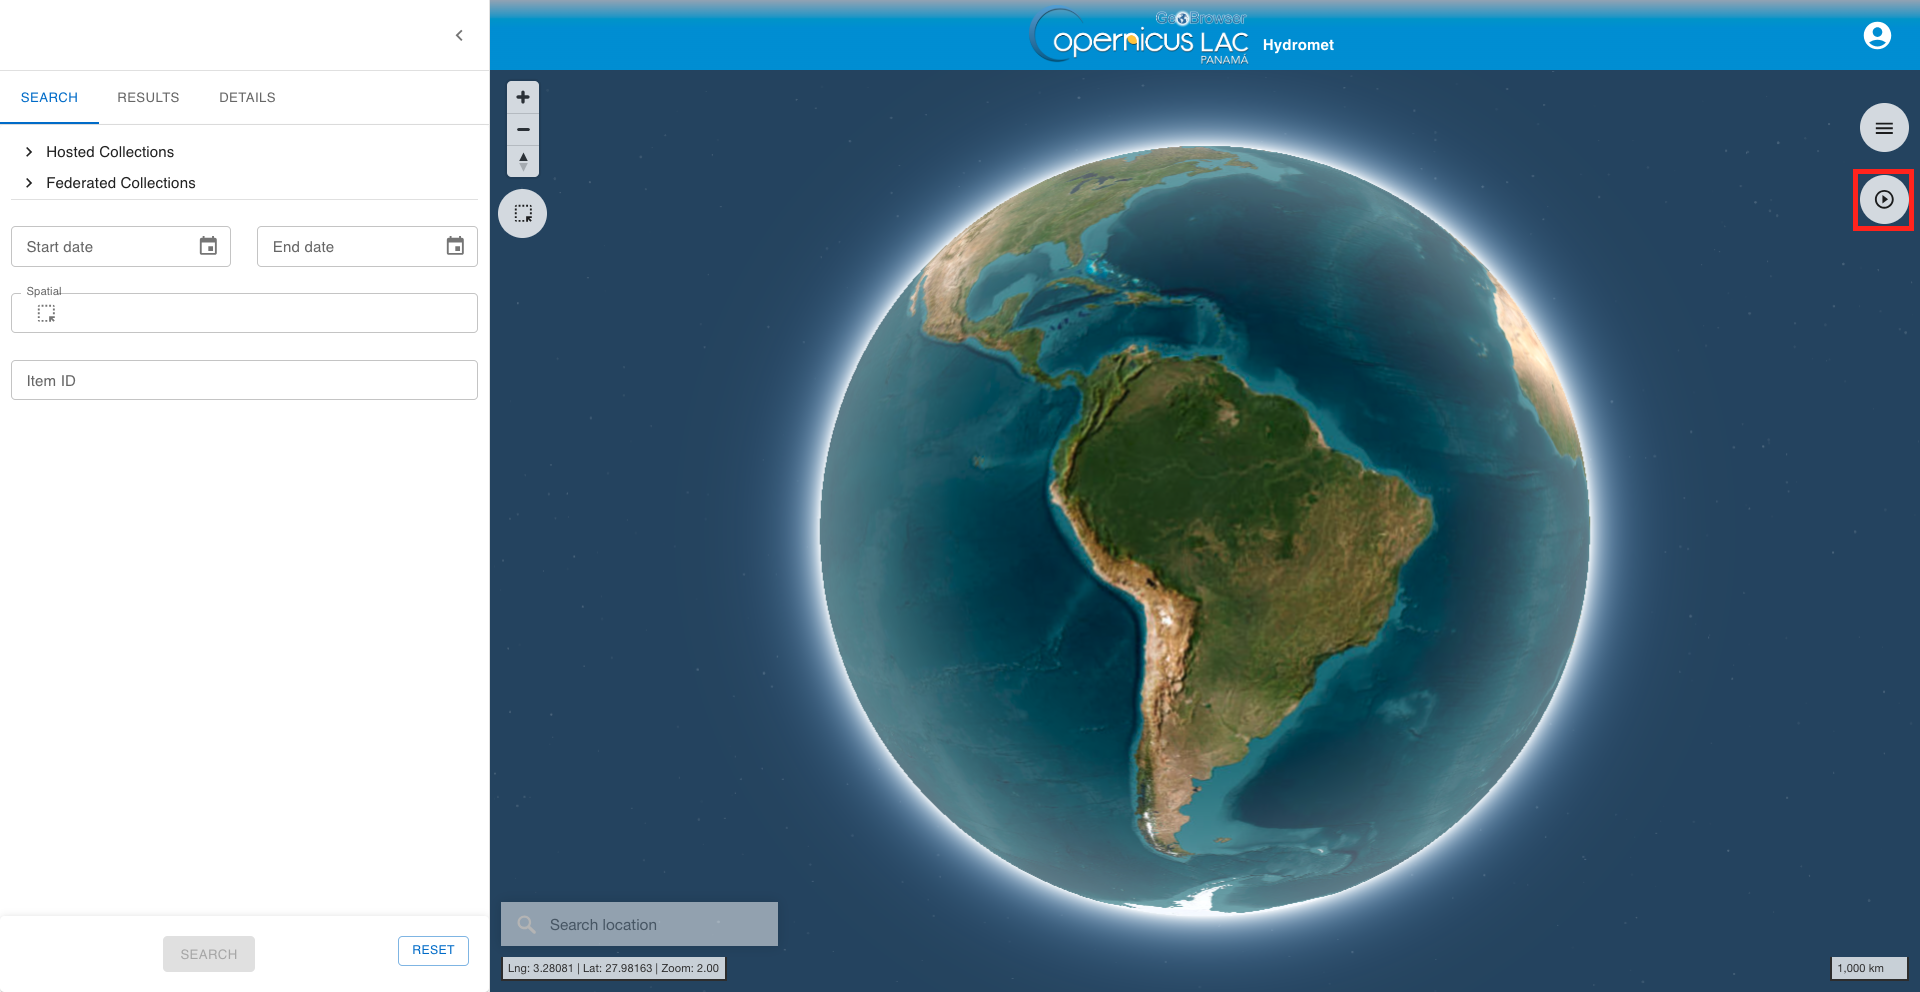
After the opening of the Hydromet workspace of the CopernicusLAC Platform open the Processing Services panel by clicking on the button located on the top right of the map.
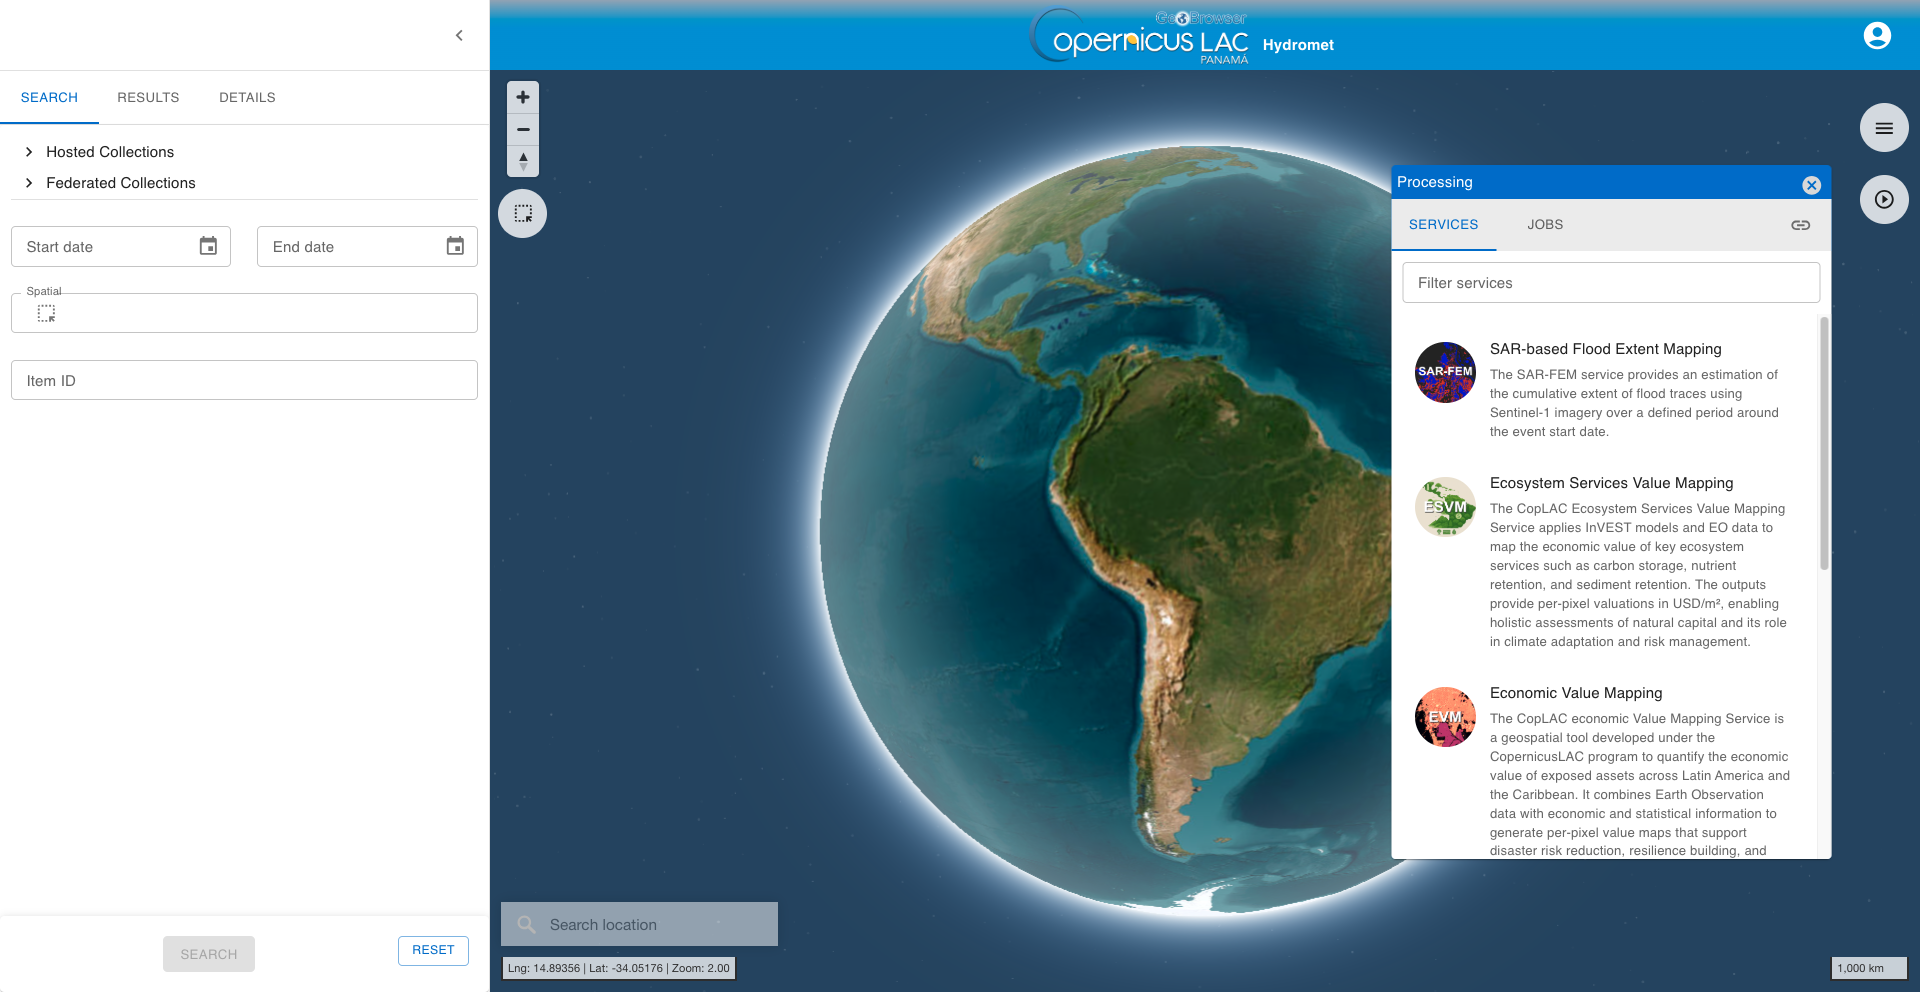
The Processing panel will be displayed with the list of on-demand services available for this workspace.
Note
By default the Processing service panel will appear as a freely draggable menu placed over the map. After a mouseover you can click and drag the panel where you want on the screen (e.g. to place it over another portion of the map or in a second monitor). However if needed, it is also possible to attach it on the left side of the interface.
To Attach the panel on the left side of the UI you shall click on the button located on the right side of the panel.
Instead, to Detach the panel click on the button.
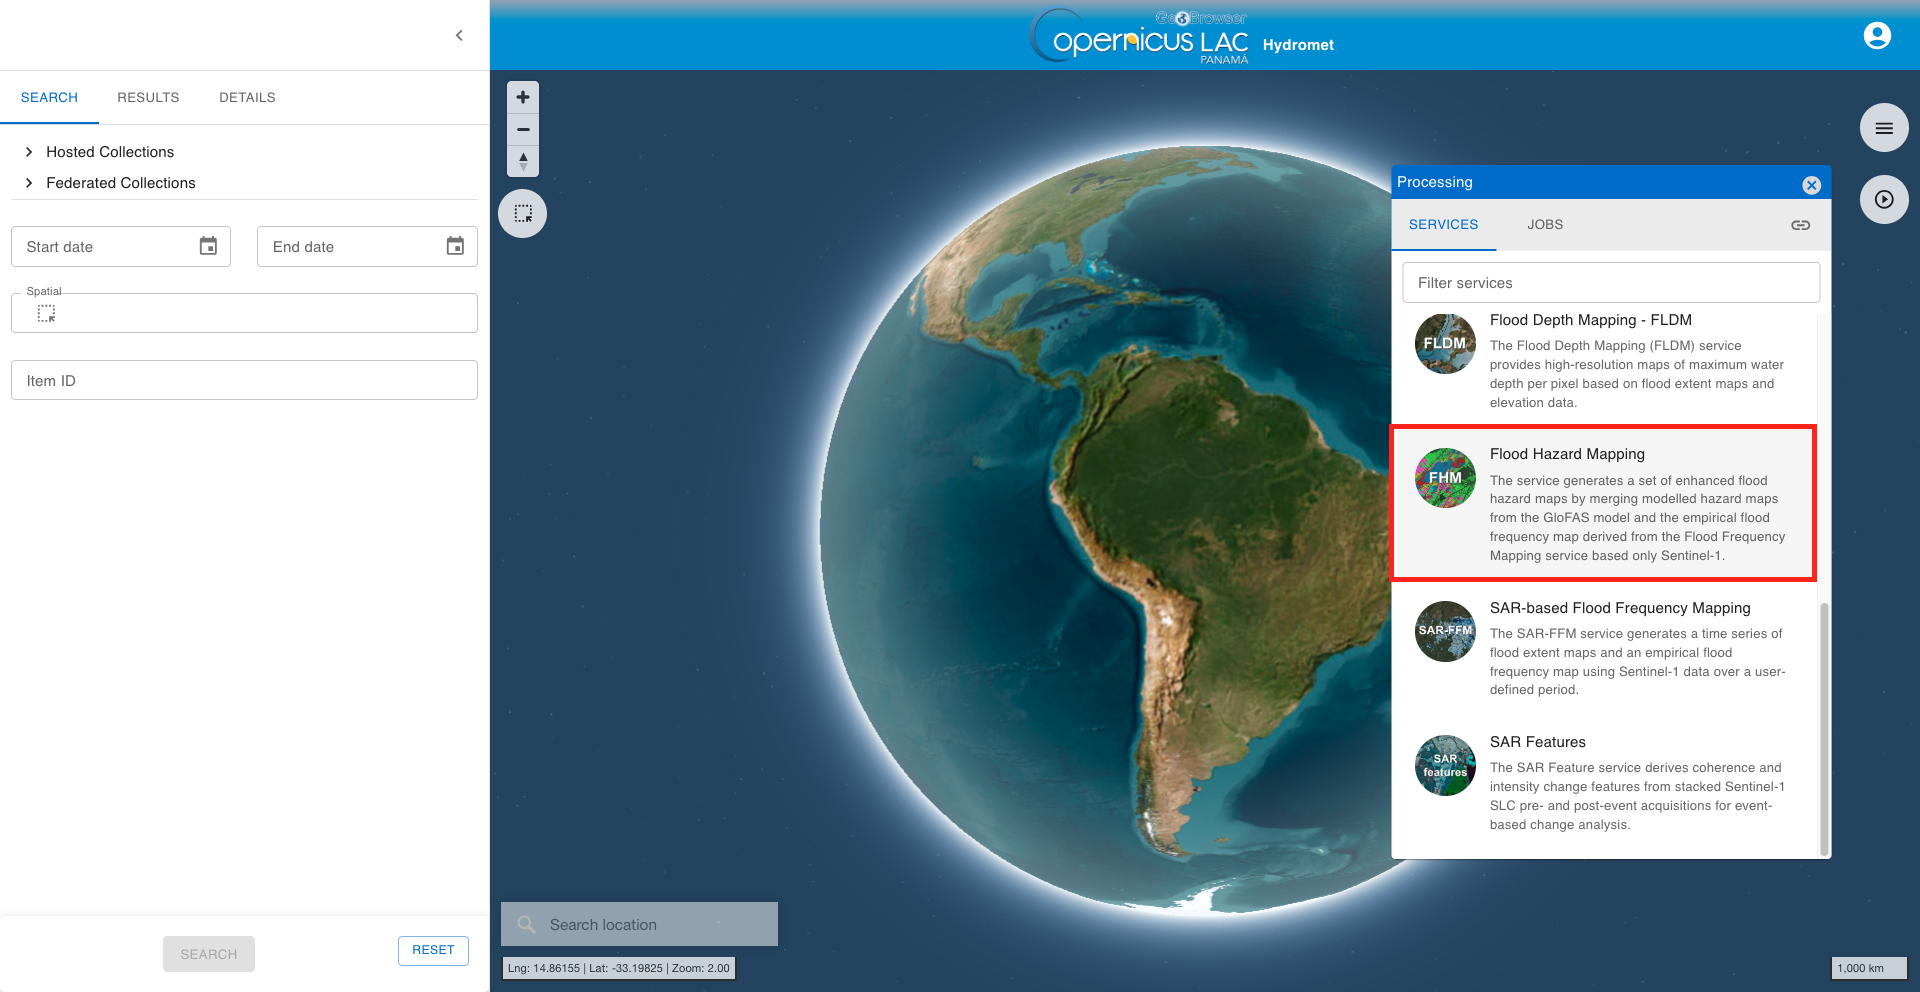
Find the Flood Hazard Mapping (FHM) service from the list and click on the button next to it.
This tab provides a quick description of the service.
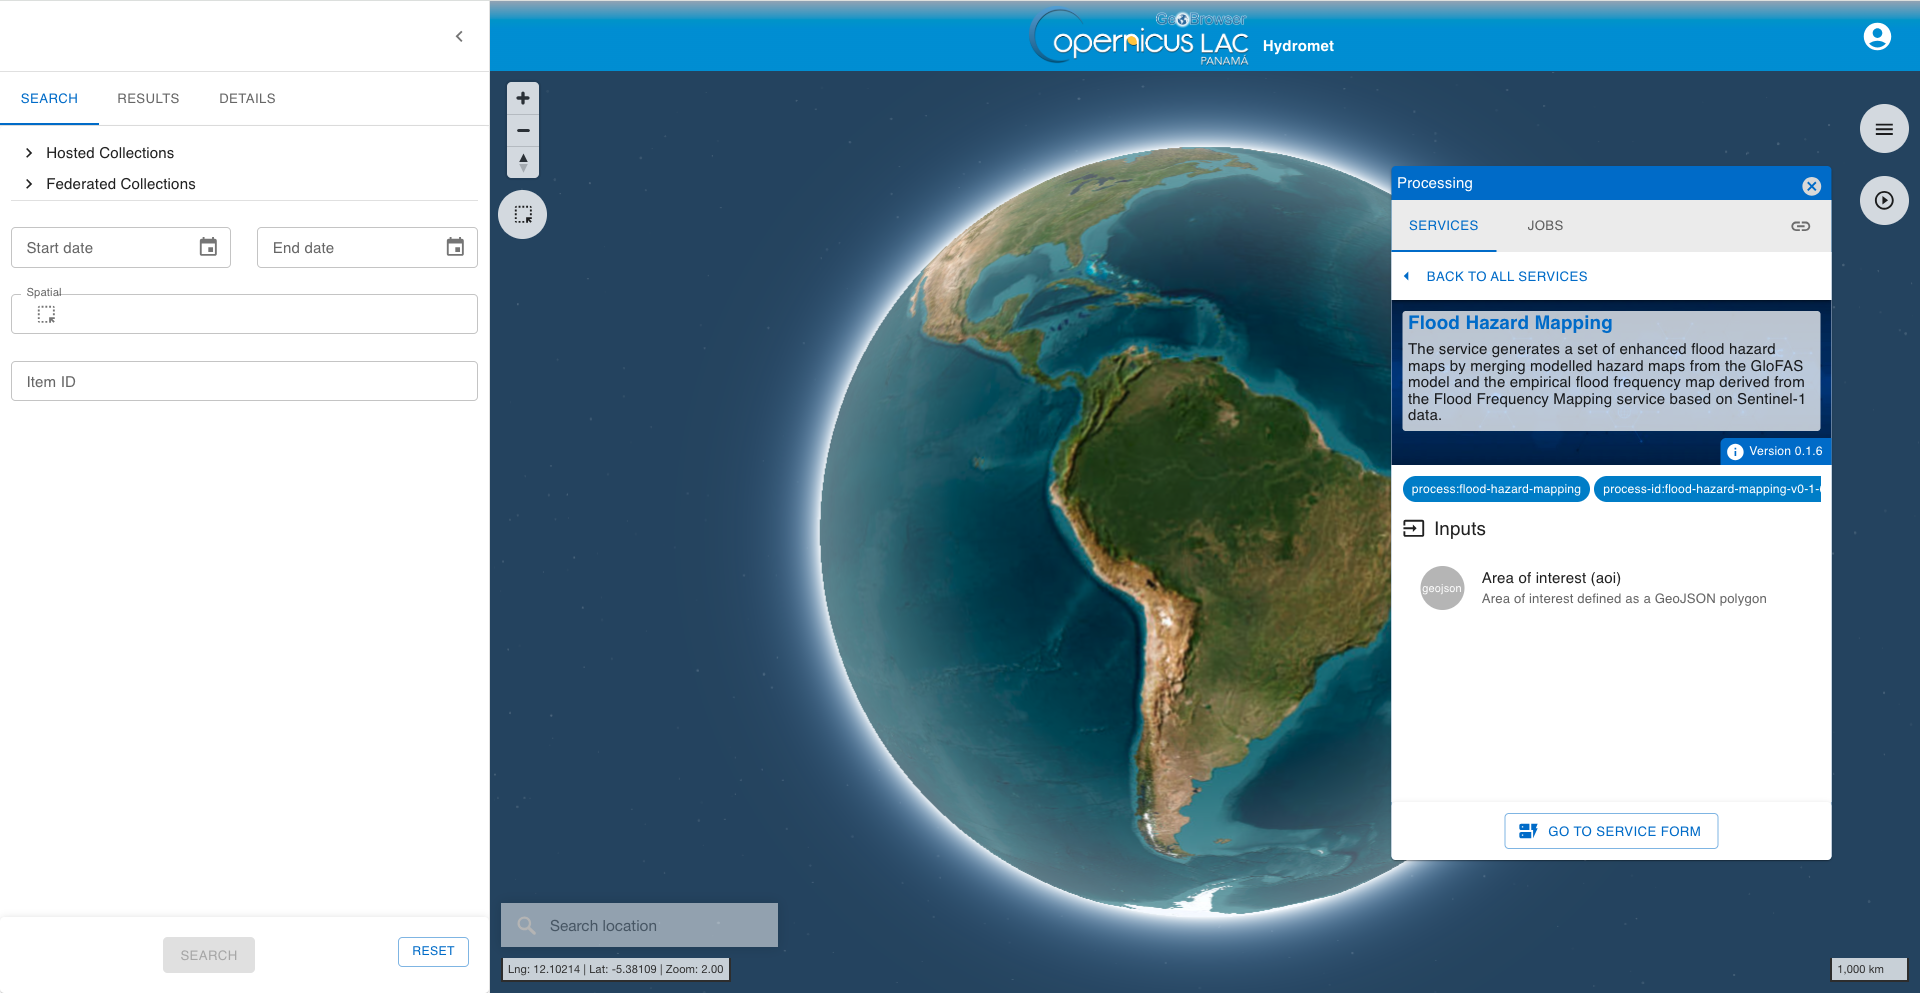
In the upper part of the tab are shown:
-
service full name,
-
service caption,
-
hyperlink to the online documentation
-
version of the service.
Below that are listed all mandatory and optional parameters that the user must define when submitting the on-demand processing. Each parameter is described with:
-
a grey circle on the left indicating the format of input value required for the parameter. As an example if the parameter is a string (e.g. catalog reference) or a number (e.g. a threshold),
-
the identifier of the parameter,
-
a brief description of the parameter.
At the bottom of the tab is located the GO TO SERVICE FORM button. Click on it to move to the next tab where the user can fill-in all service parameters and submit the on-demand job.
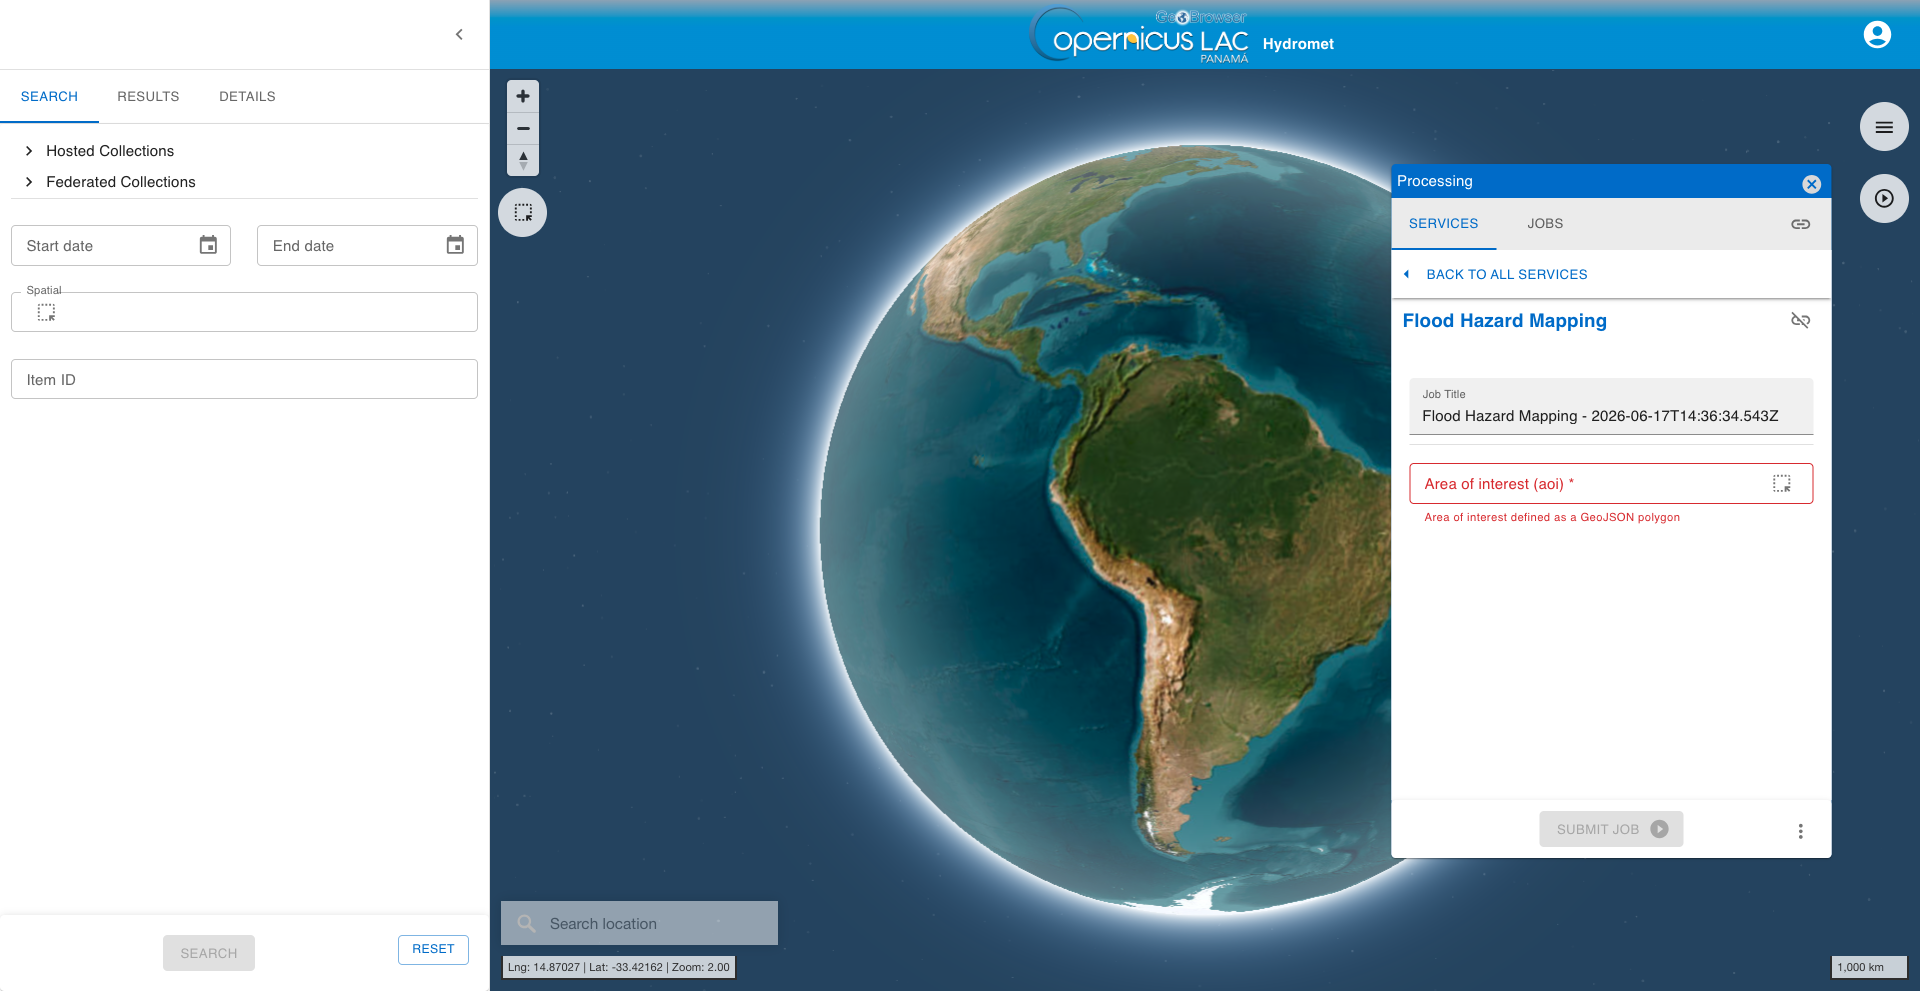
In the Service form panel mandatory parameters that are not-filled in will be highlighted in red.
Hint
To go back to the service panel click on the BACK TO ALL SERVICES button.
Fill the parameters
To start the Flood Depth Mapping service, you need to define input parameters. Access the FHM service form and then fill-in the parameters as described in the following sections.
Hint
In case you can't find anymore the FHM service form:
-
open the Processing panel by clicking on the button on the top right of the map,
-
find the FHM service from the list of services,
-
click on the button next to it,
-
and then click on the GO TO SERVICE FORM button.
Job Title
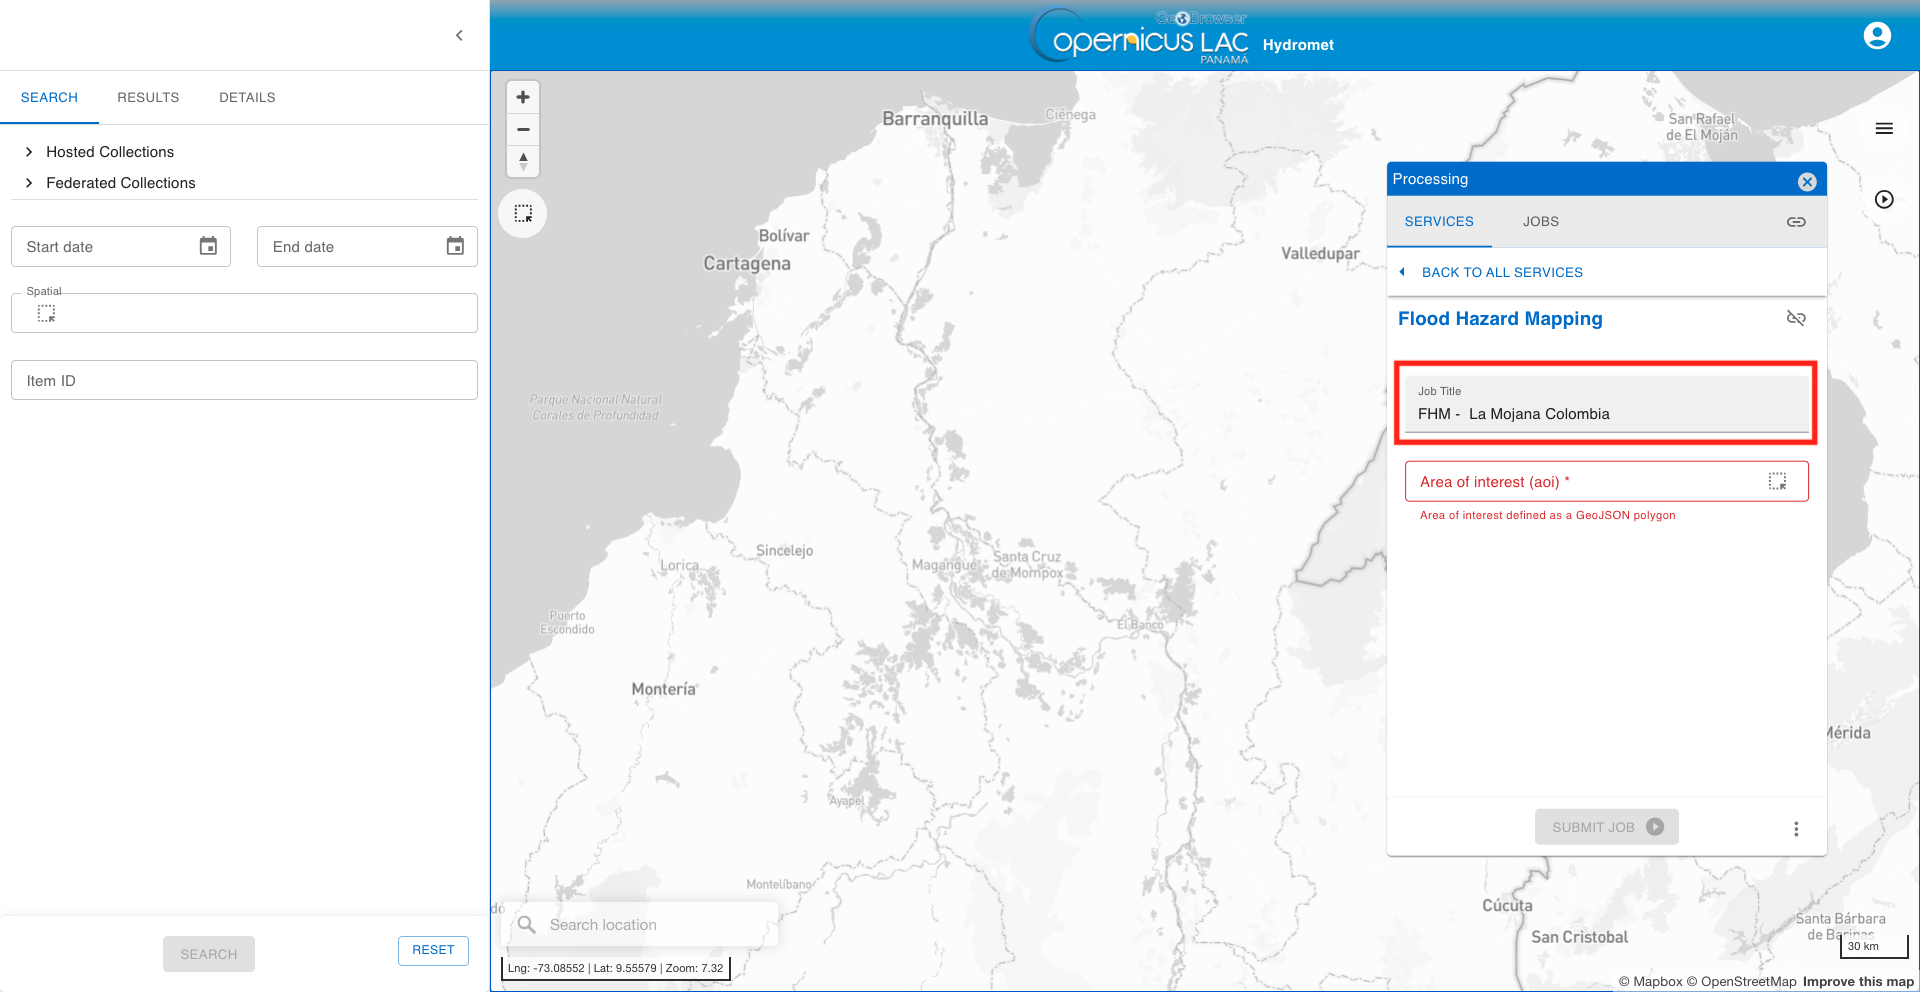
First of all you can assign a name to the on-demand job you are launching. A predefined title is generated by the platform. Modify this title and assign the title you prefer.
Zoom over la Mojana region in Colombia and for instance, insert as Job title:
FHM - La Mojana Colombia
Note
If you don’t specify a name, the system automatically assigns one using the service name Flood Hazard Mapping and the date and time of job creation.
Area of interest
This mandatory parameter allows you to specify the area where the flood hazard mapping will be made by the FHM service. The field value for the AOI must be a WKT string representing the geometry of the GeoJSON polygon.
To do so in the FHM Service form panel click on the drawing icon: material-select-arrow-up: located next to the Area of Interest field on the left.
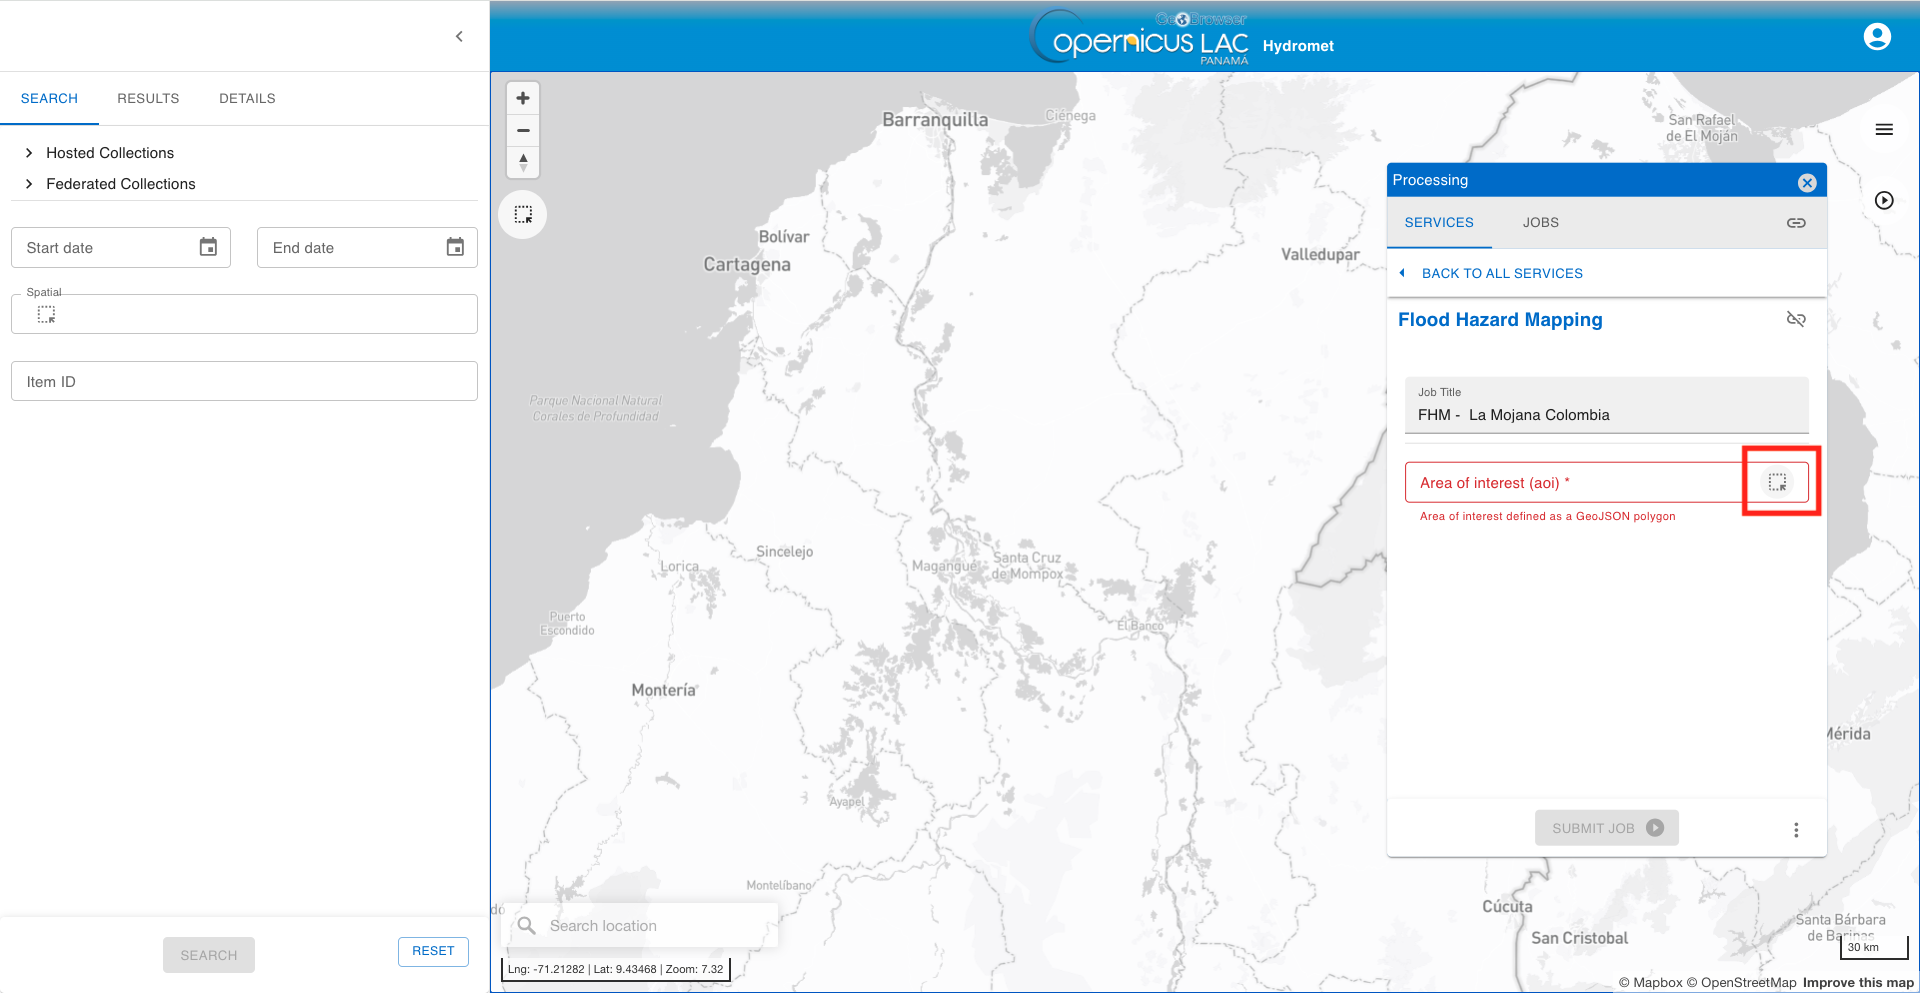
Draw a square AOI over the map. The first click defines the upper left and bottom right corners of the BBOX that are needed to define the AOI geometry.
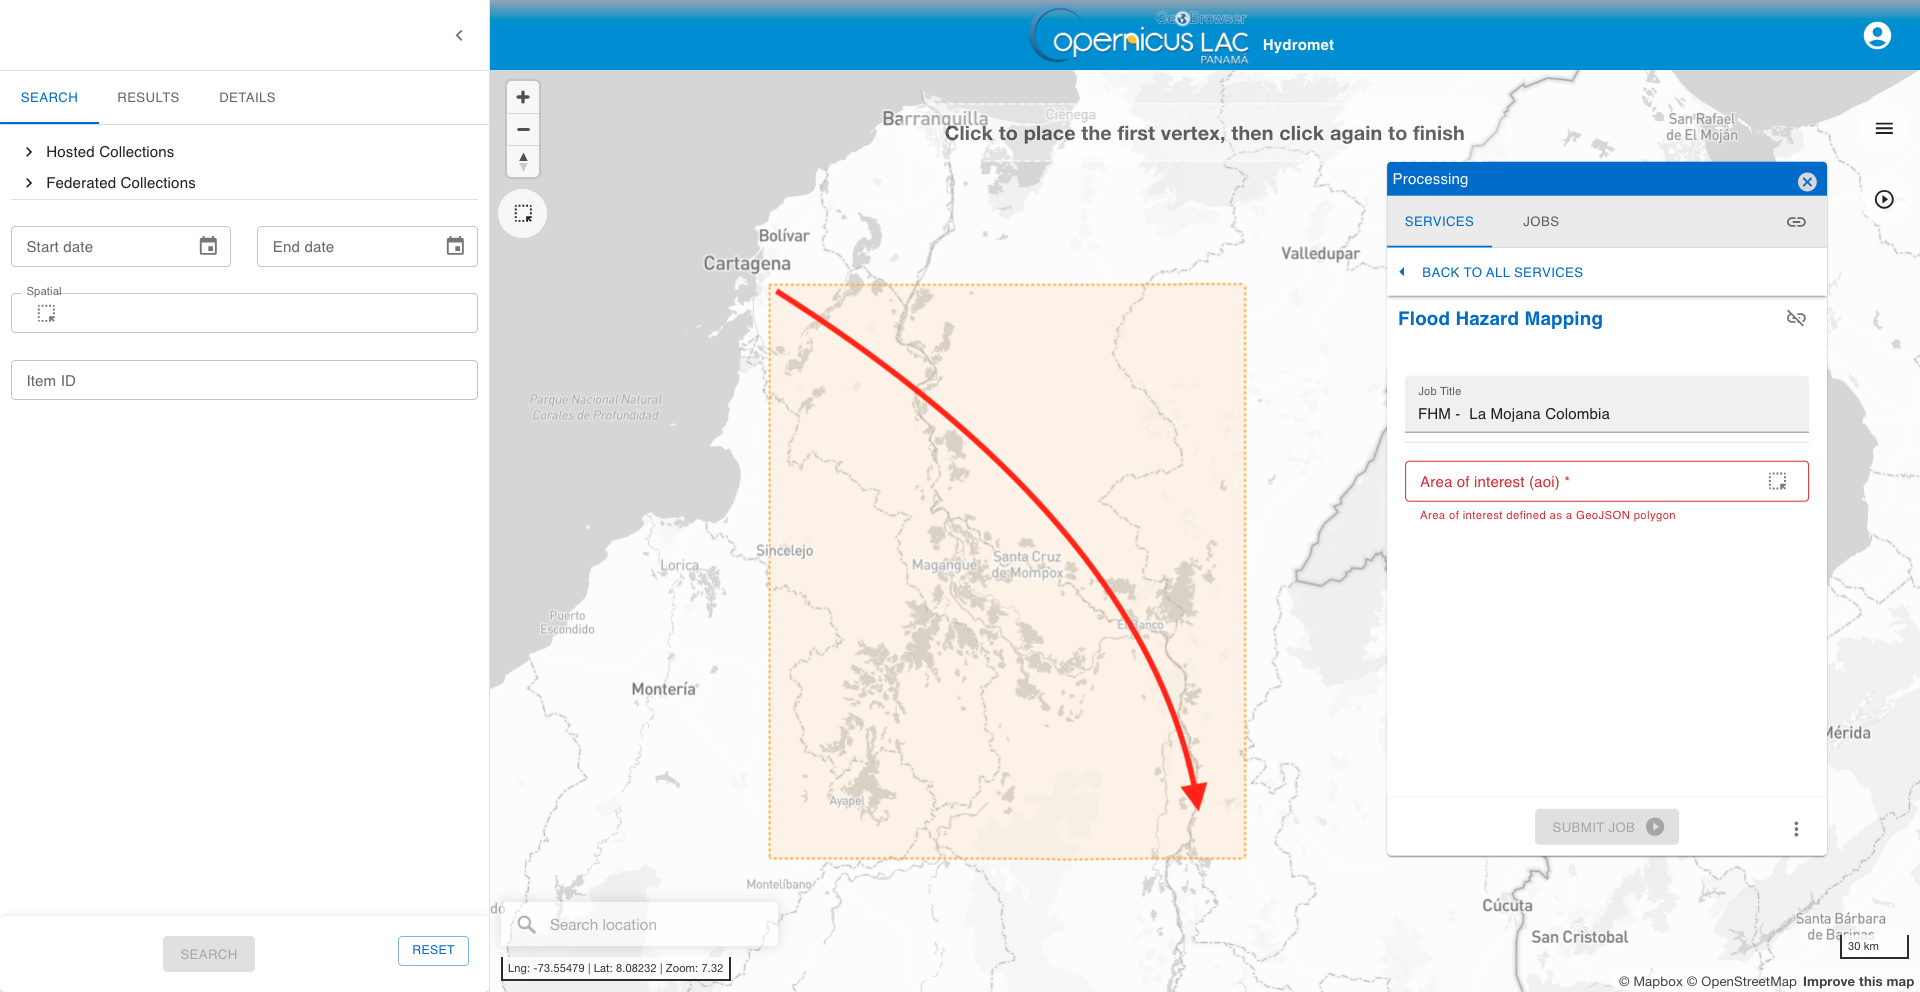
After that the field value is automatically populated with the WKT string.
POLYGON((-75.55539955512498 8.28325007051717,-74.29416731938598 8.28325007051717,-74.29416731938598 9.617688399945536,-75.55539955512498 9.617688399945536,-75.55539955512498 8.28325007051717))
Warning
The service provides in output flood hazard maps only for the portion of the AOI covered by the Flood Frequency maps.
Results from the SAR-FFM batch production are exposed in the platform. The user can consult these maps by doing a Search from the left panel under the Sentinel-1 Flood Frequency collection available under Hosted collections.
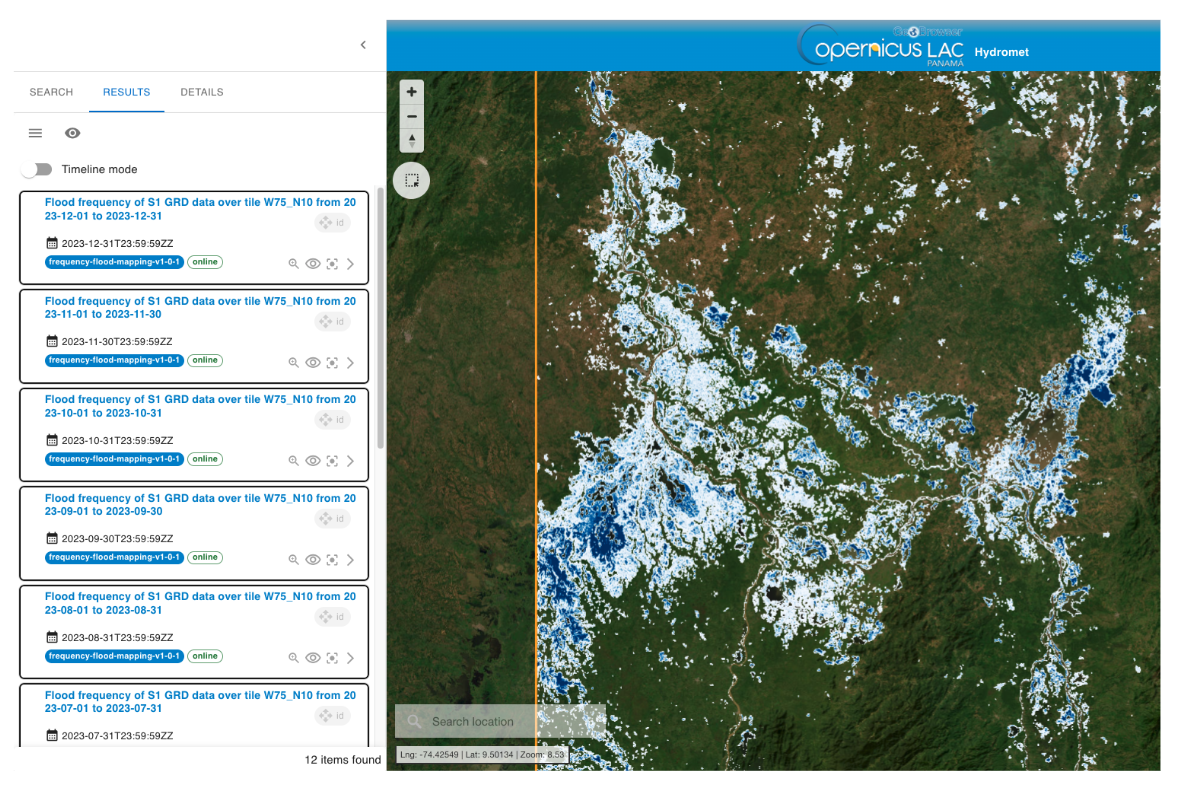
A pair of sample results from the flood frequency processing in WASDI are also exposed in the platform: a FFM from Sentinel-2 for 2015-2025 over the AOI3 covering Panama and a FFM from S1 for 2015-2025 over the AOI4 covering la Mojana Colombia.
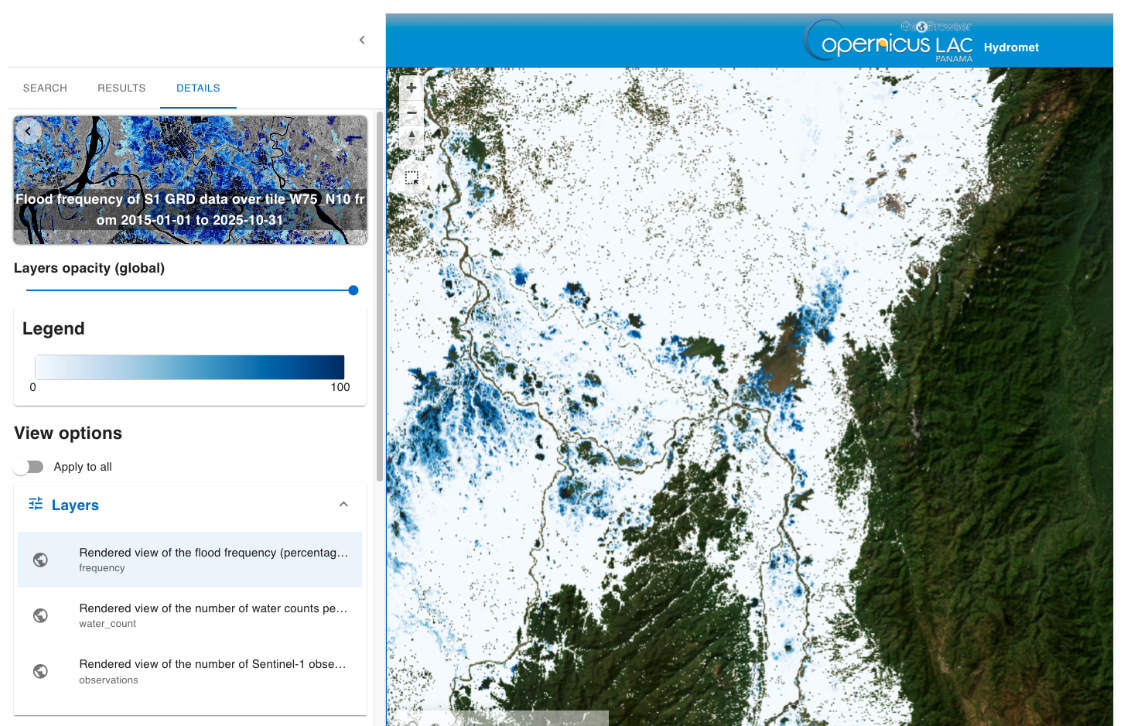
After a spatial and temporal search you can easily understand if the current flood frequency maps available in the catalog are enough to cover your AOI in the LAC.
Run the job
After filling in all the required parameters, click SUBMIT JOB to start the service.
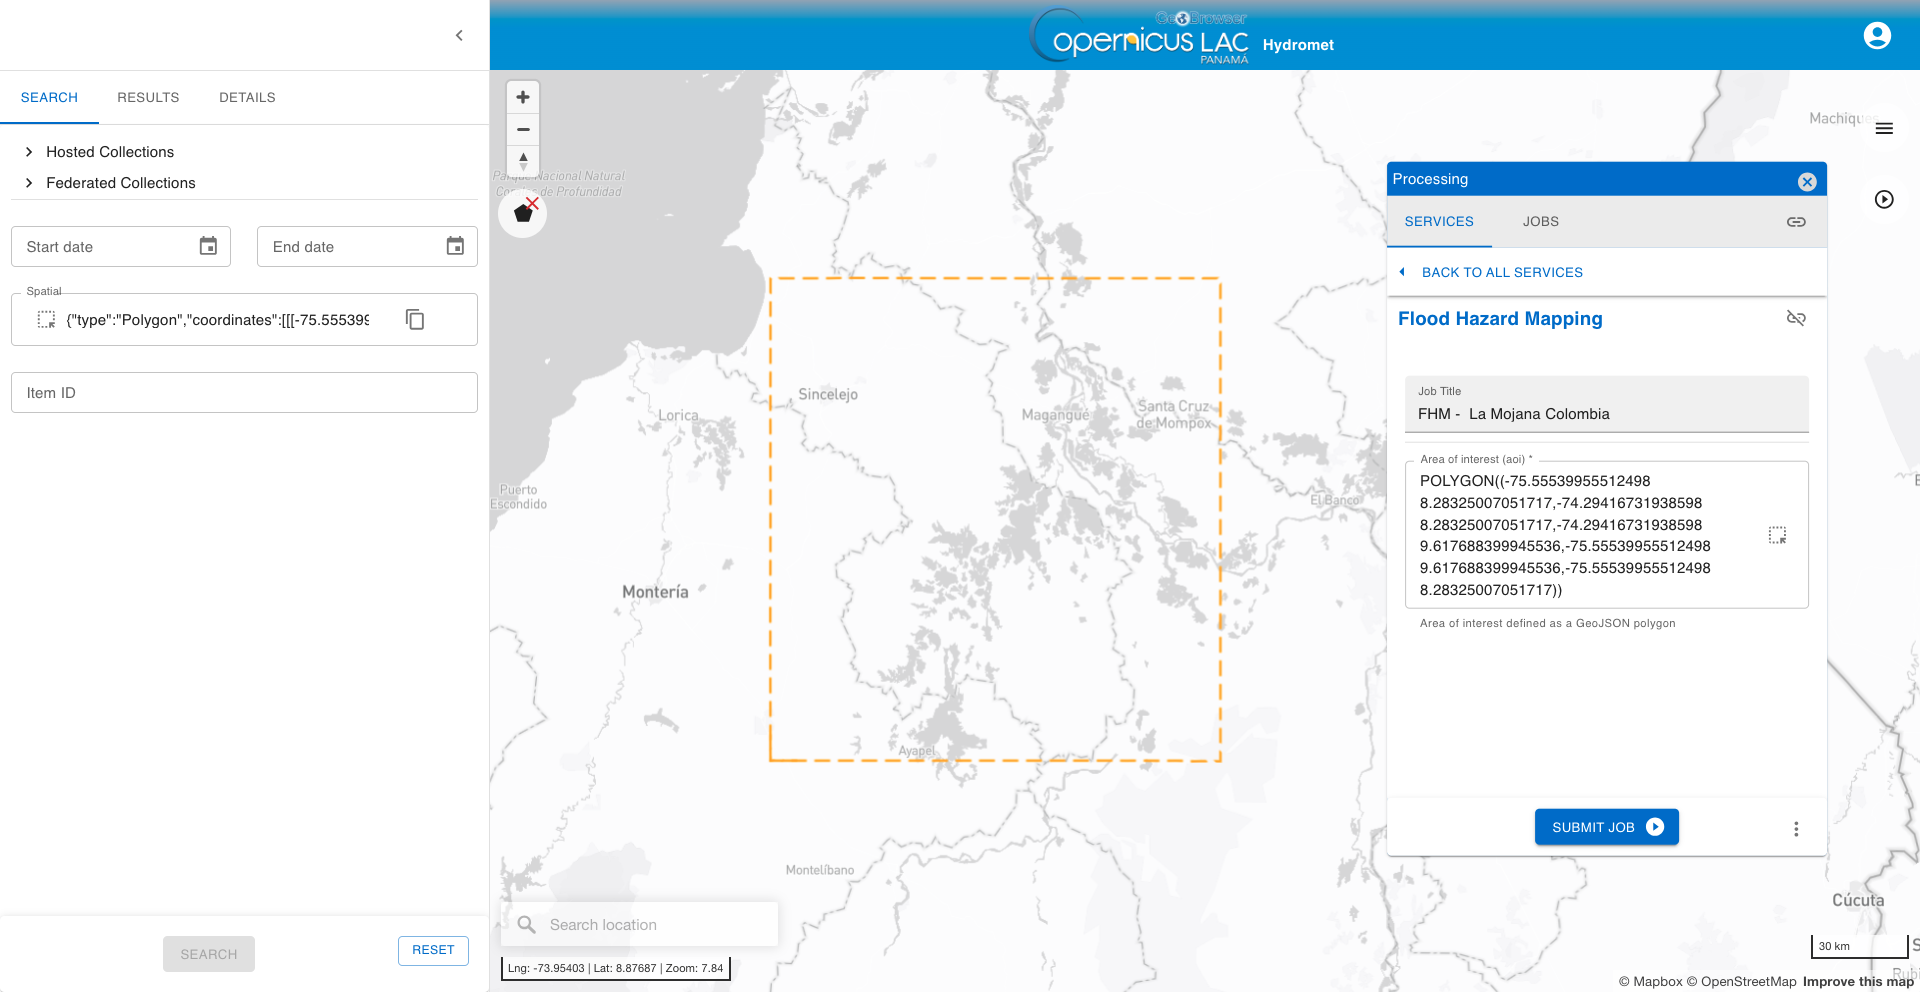
Once submitted, you will be automatically redirected to the JOBS tab, where you can view the list of all previously submitted jobs. Your newly created job will appear at the top of the list.
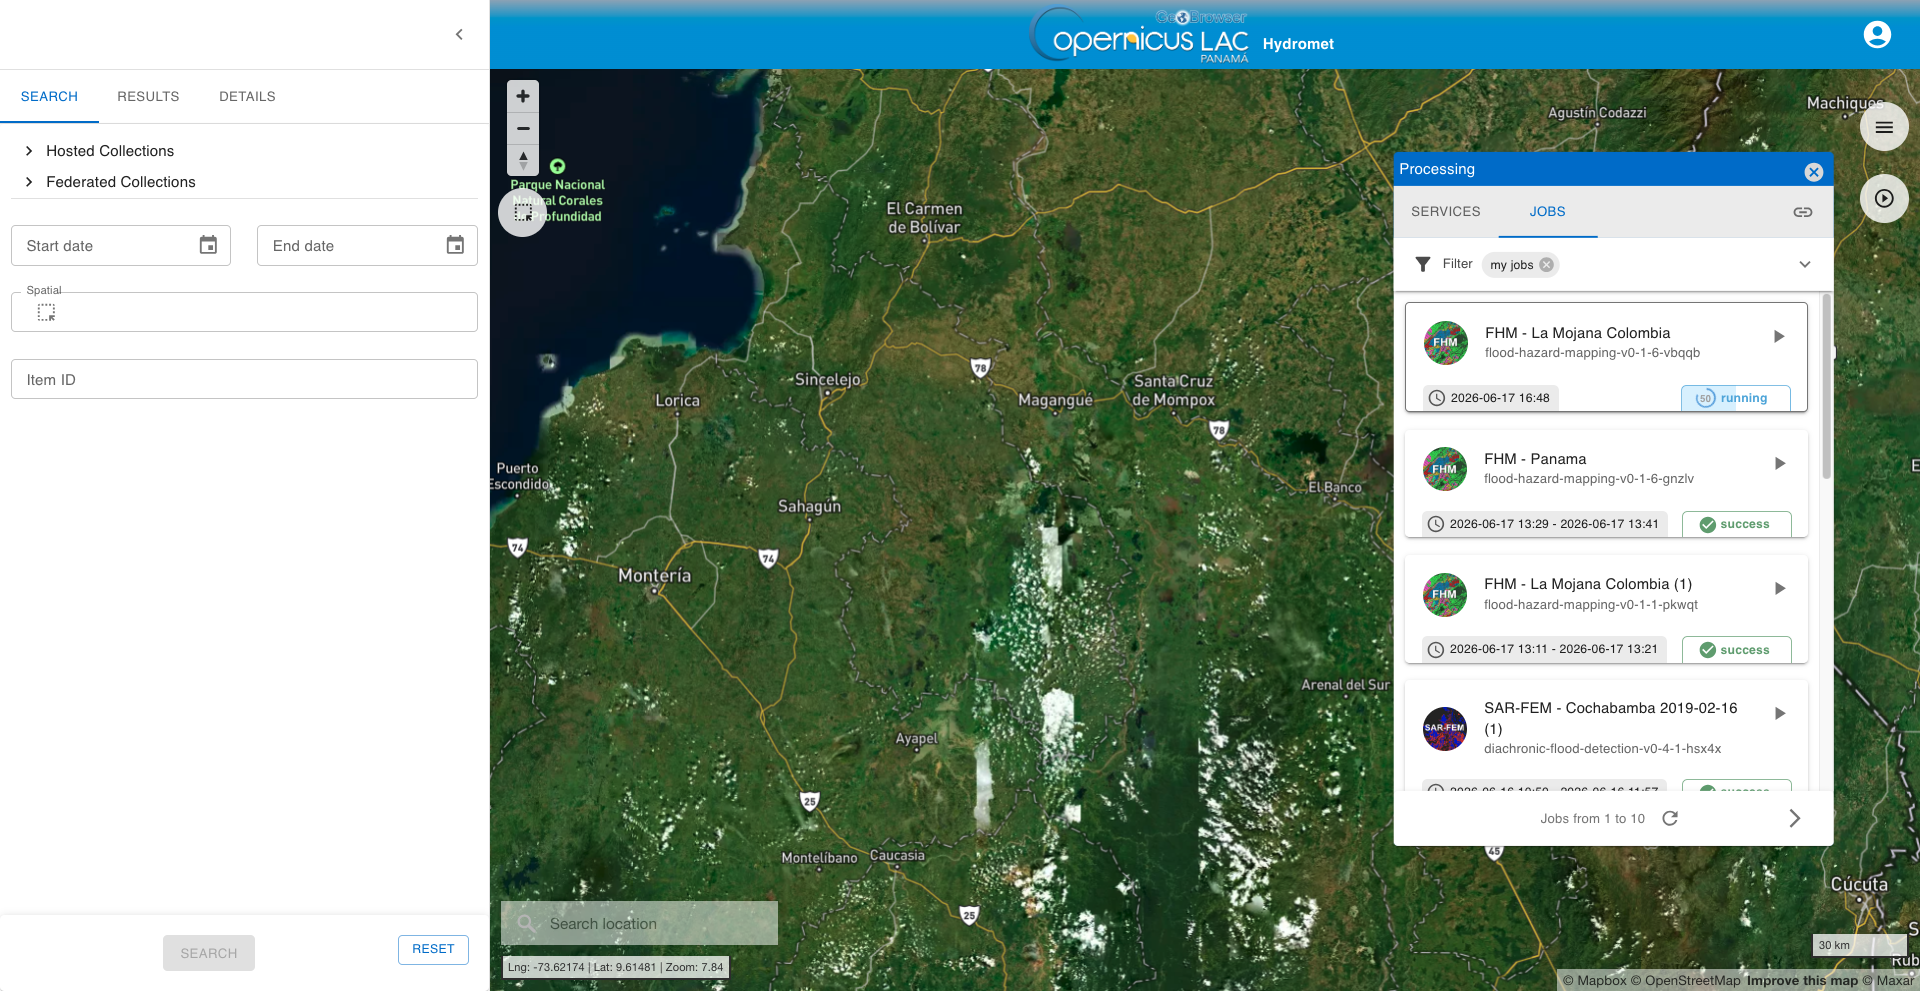
From this tab, you can monitor the progress of your job, which can have one of the following statuses: running, succeeded or failed.
Note
Typically, the service execution is ranging from a few minutes depending on the extent of the user’s AOI, and the allocation of processing resources for the job to be executed. As an example, to employ the FHM service over an AOI of about 4300000 ha the processing time is approximately 20 minutes.
Results
Once the job is successfully accomplished, click on the button next to the title of the job.
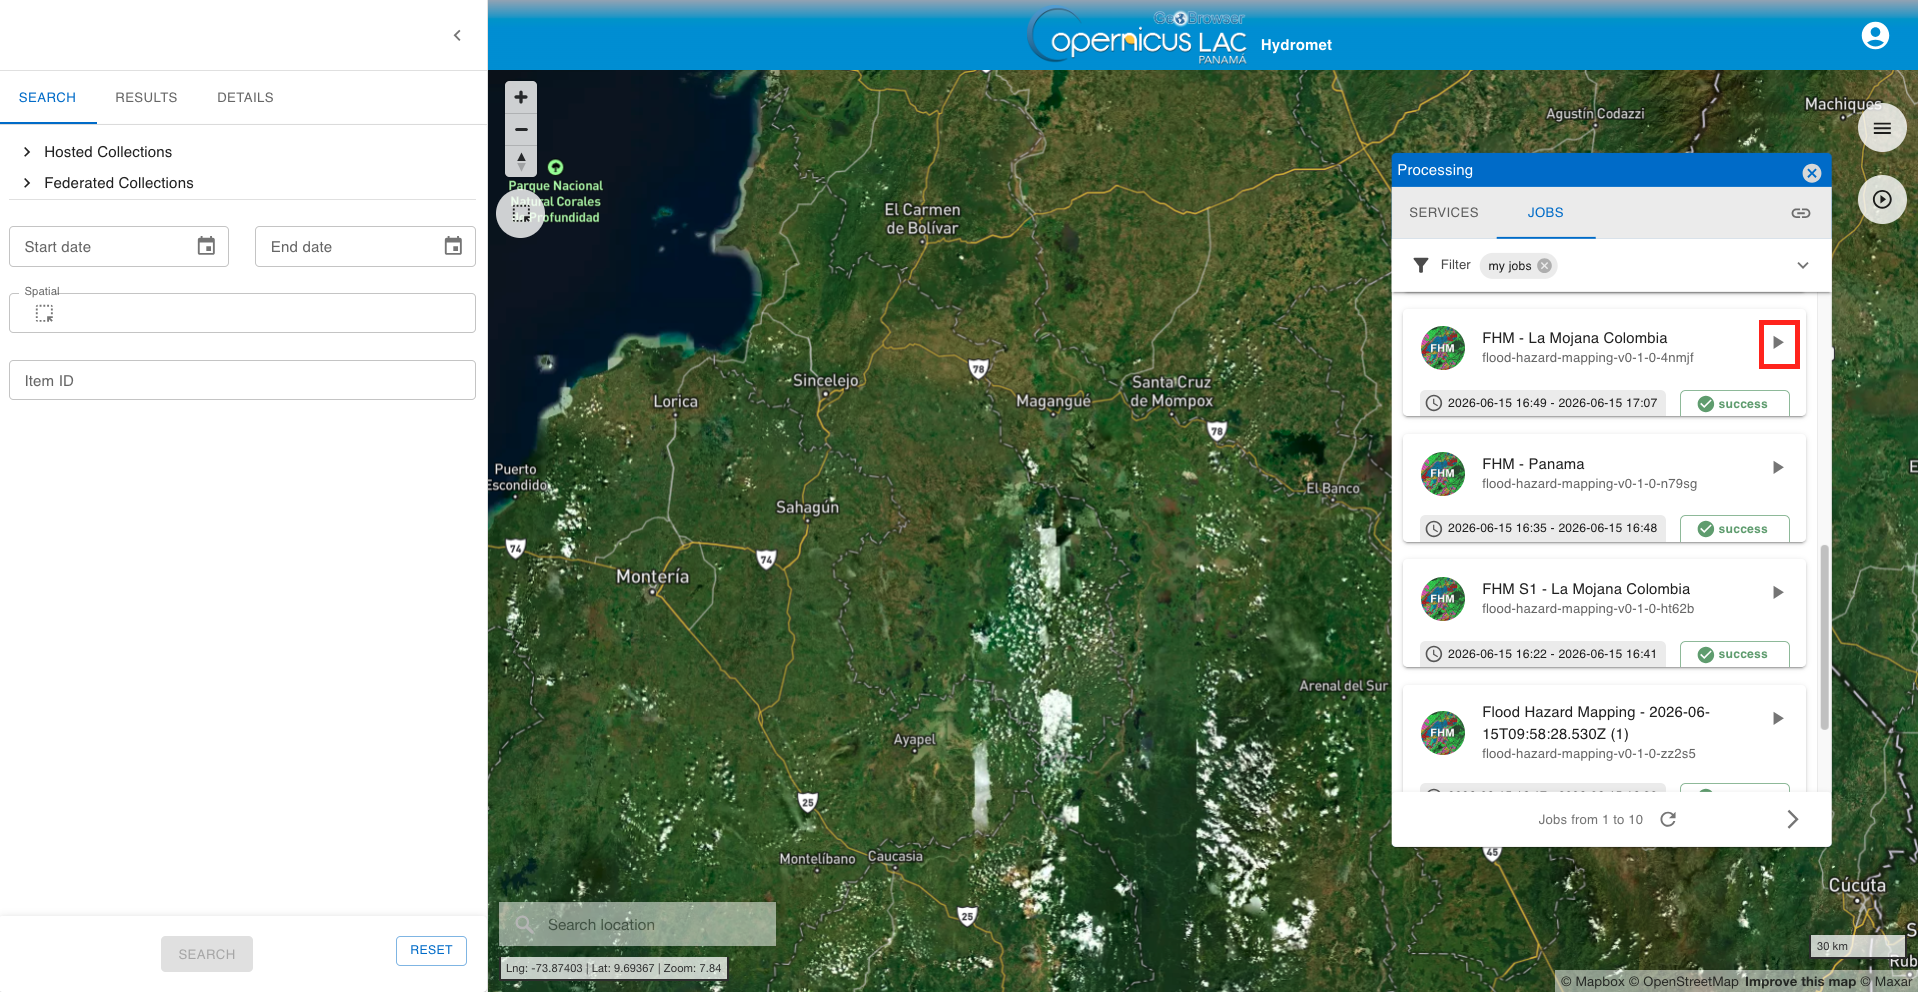
Under the job details click on the button SHOW RESULTS ON MAP located in the JOBS tab of the left panel.
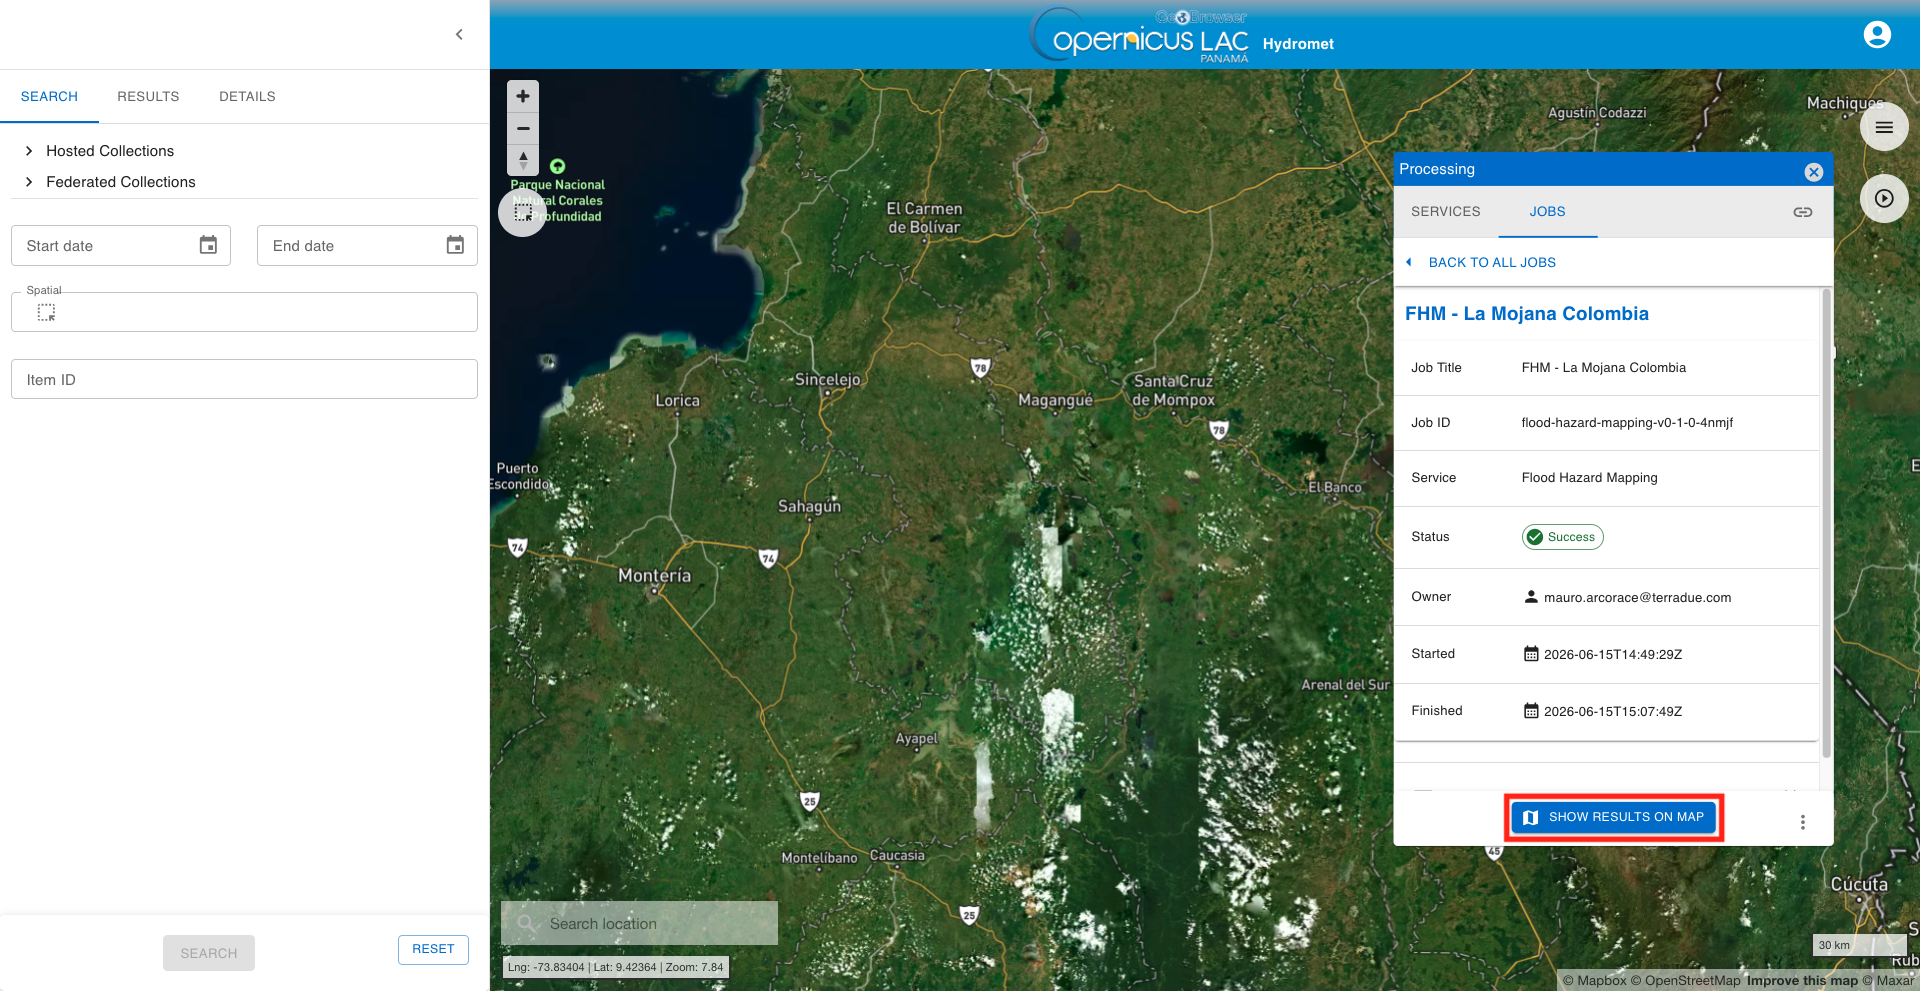
After that, all the product generated by the service will be displayed on the map.
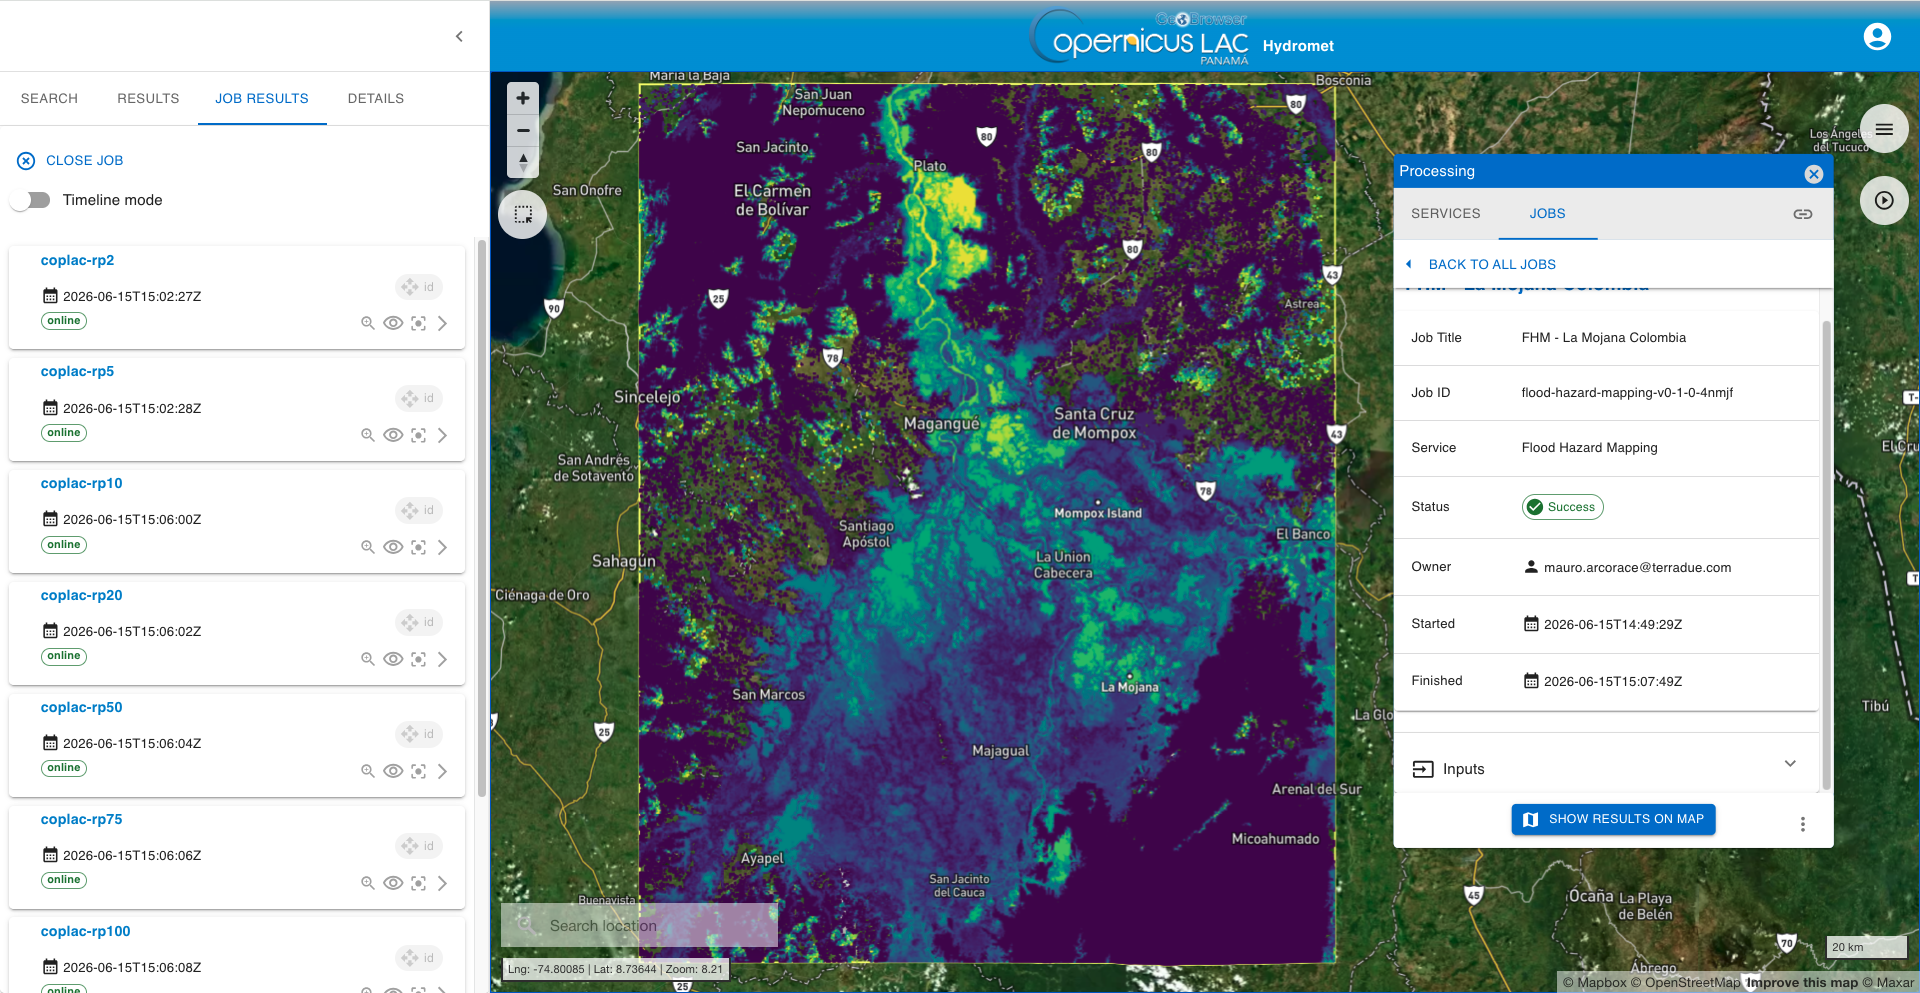
From the left panel under the JOB RESULTS tab is shown a list of the output STAC items genereated by the FHM, one for each return period (RP 2, 5, 10, 20, 50, 75, 100, 200, 500 years). Select one of them, for instance the coplac-rp50 one, by clicking on its title.
After that in the left panel you will be automatically redirected to the DETAILS tab providing you the 2 layers that you can visualize on the map for the selected 50-year RP flood hazard map product:
-
rendered view of the Water Depth Map (WDM) product in meters with the
viridispalette -
rendered view of the Water Surface Elevation (WSE) product in meters with the
terrainpalette
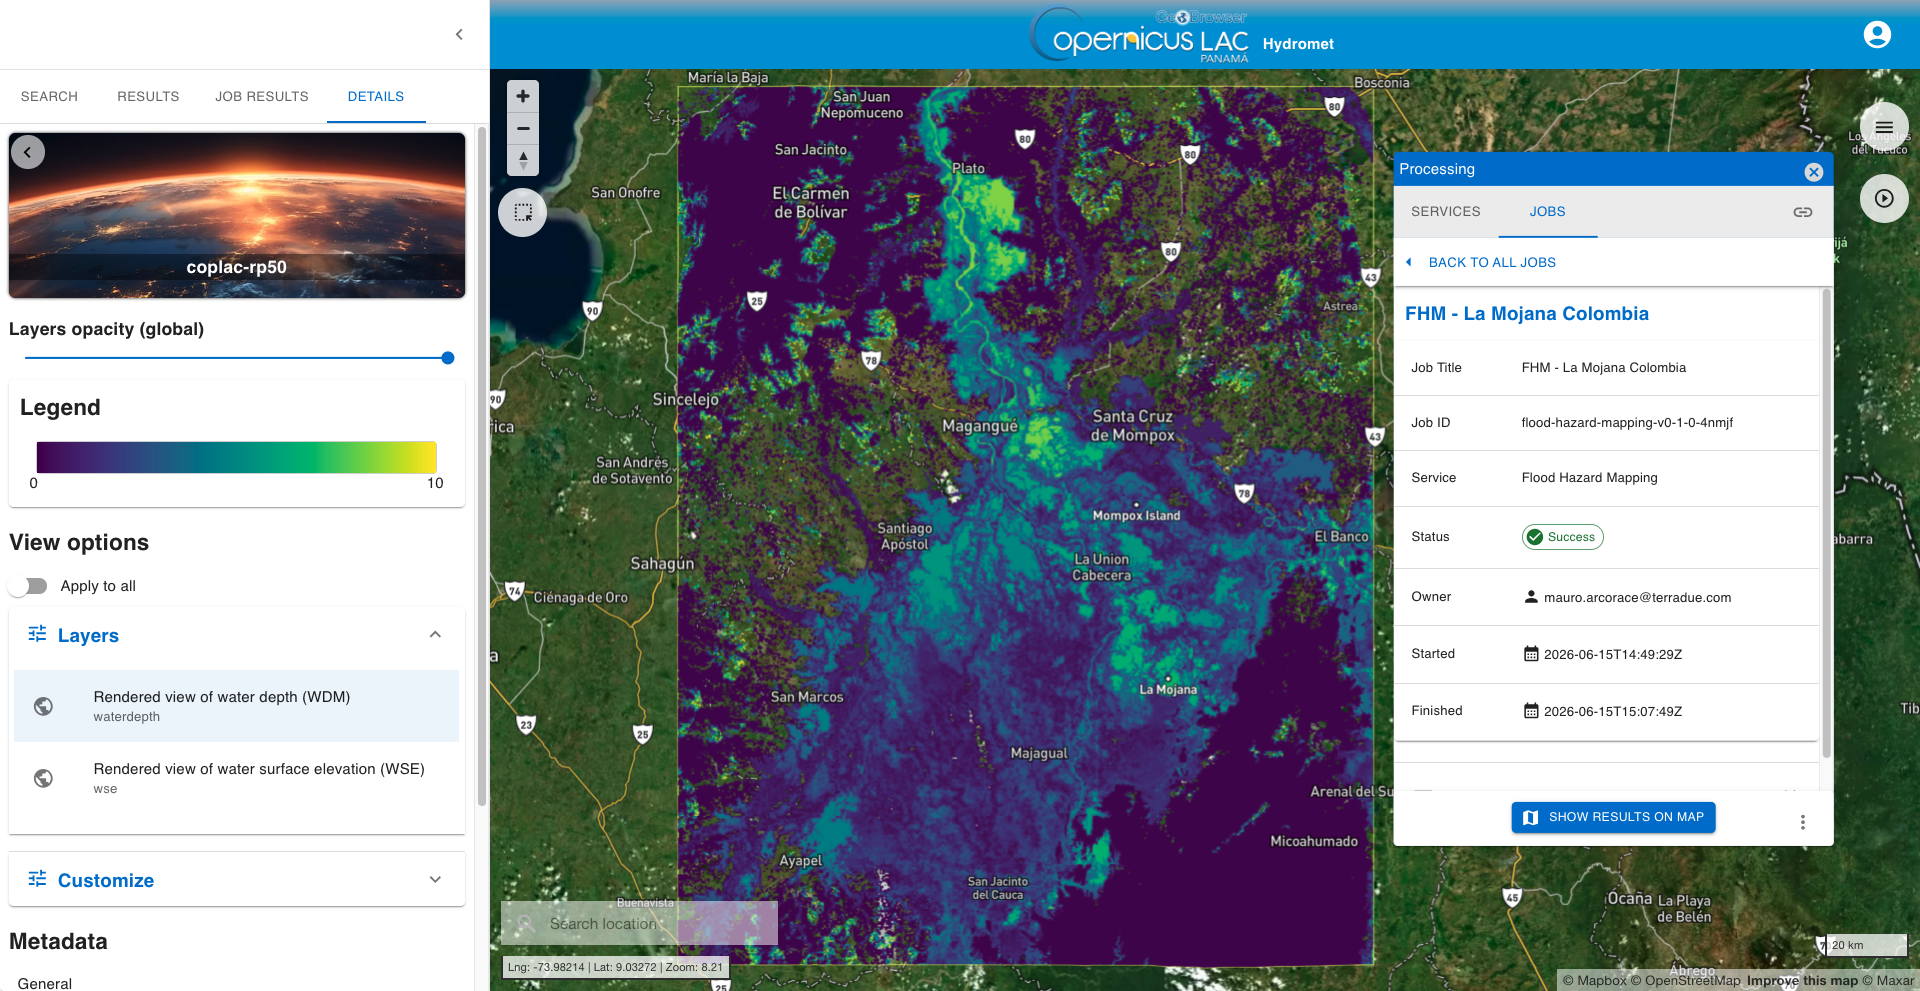
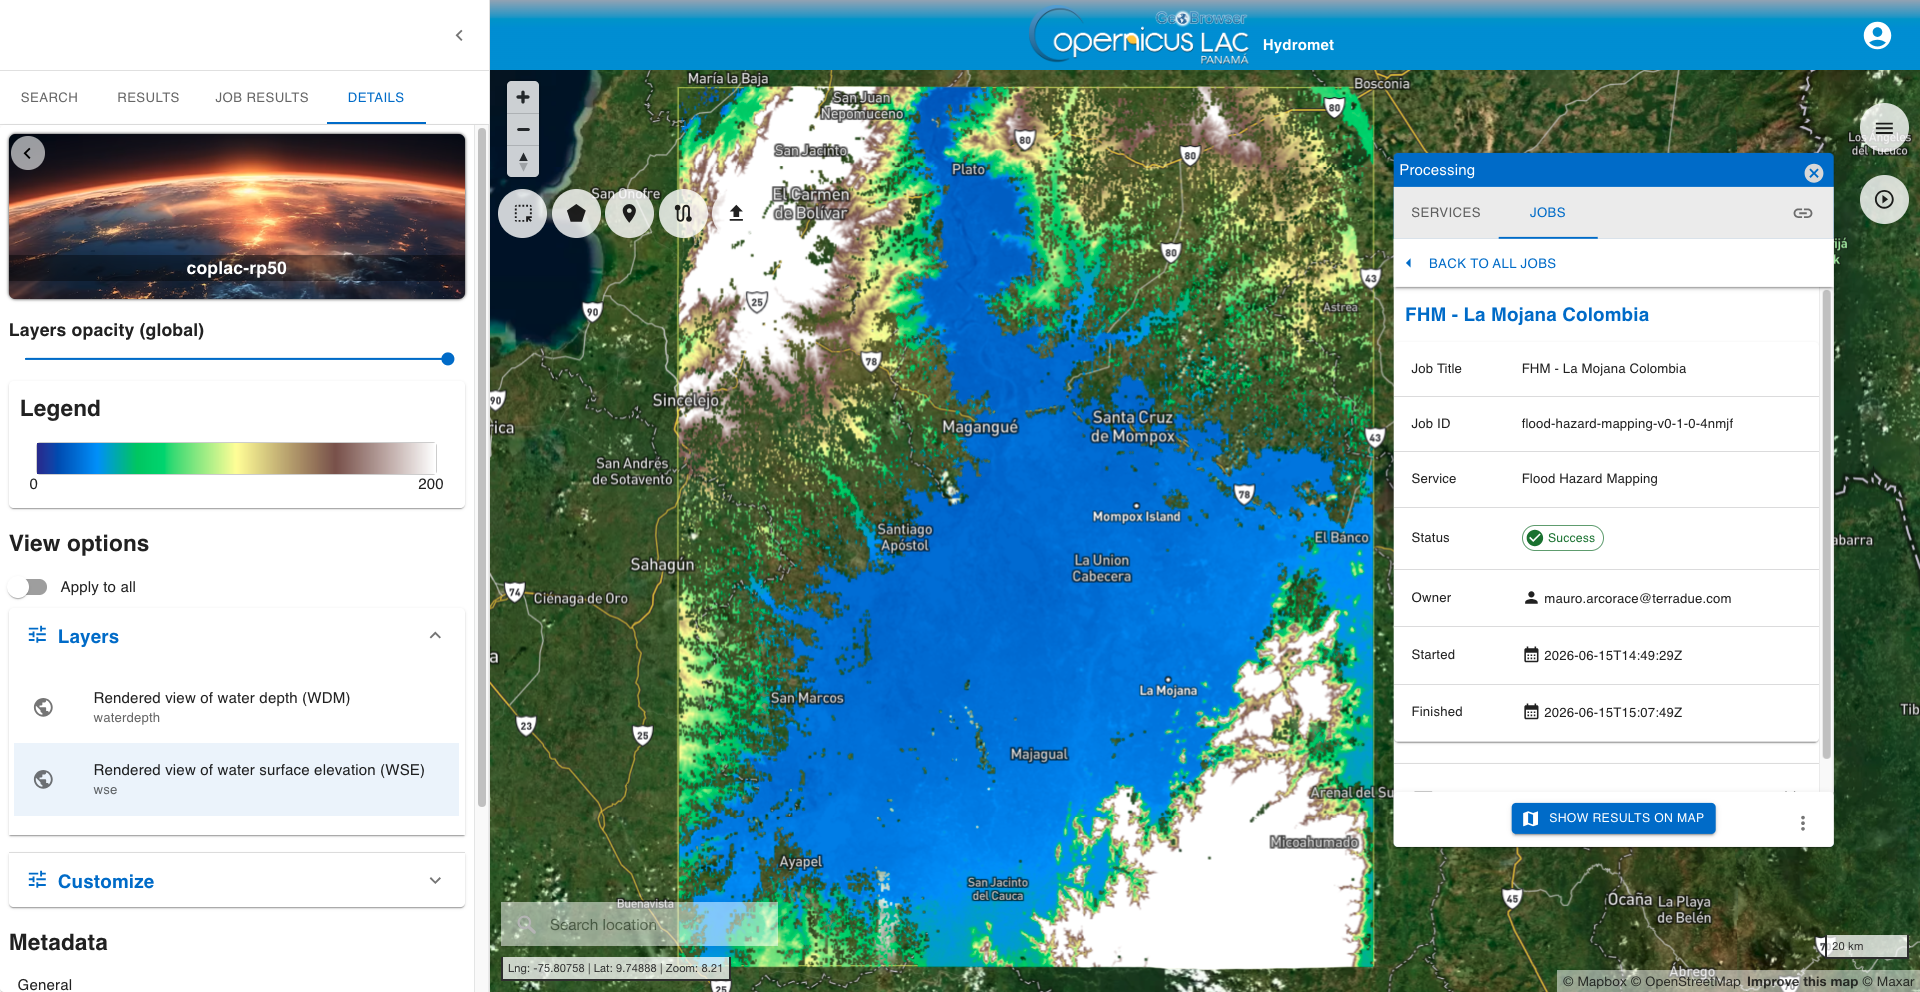
By default, the layer shown on the map is the first one from the list which is the one derived from the rendering of the waterdepth asset. From the DETAILS tab in the left panel, it is also possible to:
-
set the opacity of the layer,
-
consult job metadata,
-
visualize the legend of the product,
-
under view options consult the render applied to the layer and, its histogram (when available), and apply a custom render,
-
download the product.
Hint
Do you want to see both the result and the underneath satellite imagery baselayer? Try using the Layers opacity (global) bar, and set the opacity as 50% to better see for instance also the labels of the basemap layer.
Note
Aren't you satisfied with the default render of the product available under Layers in the View options? You can customize it by clicking on Customize under View options in the left panel. Please note that when you apply a custom render to the asset the legend will be updated accordingly.
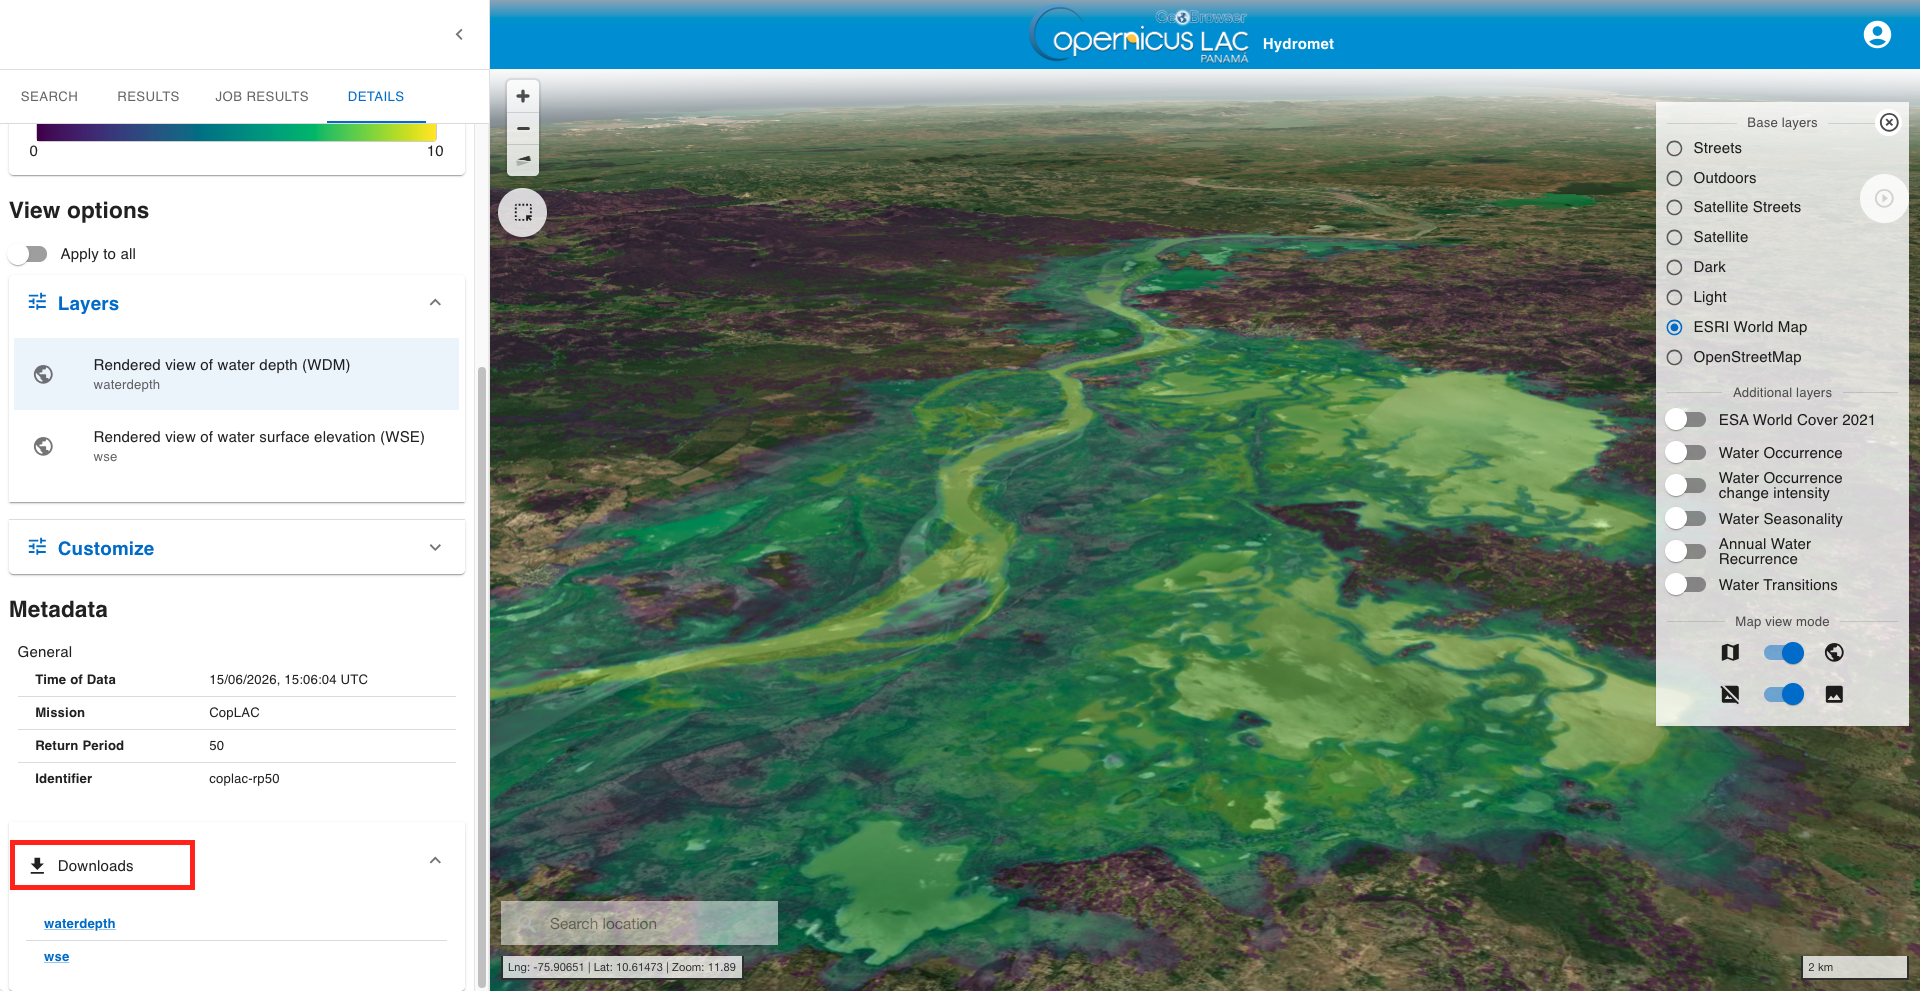
To download the product from the left panel click on the Downloads dropdown button and then on the hyperlink to download one of assets:
-
wse,
-
waterdepth.
More information about each product can be found in the FHM service specifications.